Monday, December 30, 2013

DIY | Pattern Weights

I was motivated to complete this DIY project after growing tired of using pins to keep my pattern pieces in place. Pattern pieces are extremely light and can blow away with the slightest hint of wind. Instead of making my patterns holy...get it...Holy! LOL. Okay..I will keep my day job. I have decided to create some "chic" pattern weights with some left over fabric. Listed below are the step-by-step instructions on how to create these chic/useful sewing tools.


Step 1: Cut your fabric into 4"x4" pieces...or you could use the pre-cut quilting pieces. Place right sides together, sew around three of the four sides.


Step 2: Snip corners. This will help when it's time to push the corners out.


Step 3: Turn your squares inside out, press with iron, and fill half way with beans or rice...your choice!!


Step 4: Use a bonding strip, needle/thread, or glue gun to seal off your pattern weights.


Step 5: (Optional) Accessorize your pattern weights with your choice of ornament.


Can you guess one of my future project? lol. Remember to have fun with your style and stay beautiful!!

Happy New Year!! 
See you 
in 
2014!!


Wednesday, December 25, 2013

Happy Holidays 2013!!

This year has flown by so quick!! The ball was just dropping for 2013. With that said, take some time to enjoy the things you love. Before you know it, you'll be asking, "Where did the time go". I hope everyone is having an Amazing Holiday Season and enjoying their family.

Monday, December 23, 2013

See & Sew Pattern | B5203

Outfit | Leather Jacket (George | Wal-Mart), Infinity Scarf (DIY), Tights (Wal-Mart), Purse & Shoes (JustFab.com)


Pattern:
See & Sew Pattern B5203 | Style B  Click Here

Fabric Used: 
Stretch Knit Fabric | Fabric.com

Pattern Sizing: 
I used a size 14. The style is designed to fit loose and the pattern is true to size.

Time to Finish
2 hours without any interruptions. I am a mother and my life is full of interruption. It took me about a week because I have about 30 minutes of free time 4 to 5 nights a week. Pretty good!!

Did the pattern match the results?
Yes.

Difficulty of Pattern
The pattern was super easy. Style B only has 5 pieces.
(Front Bodice | Cut on the fold, Back Bodice | Cut 2, Sleeves | Cut 2)

Likes/Dislikes
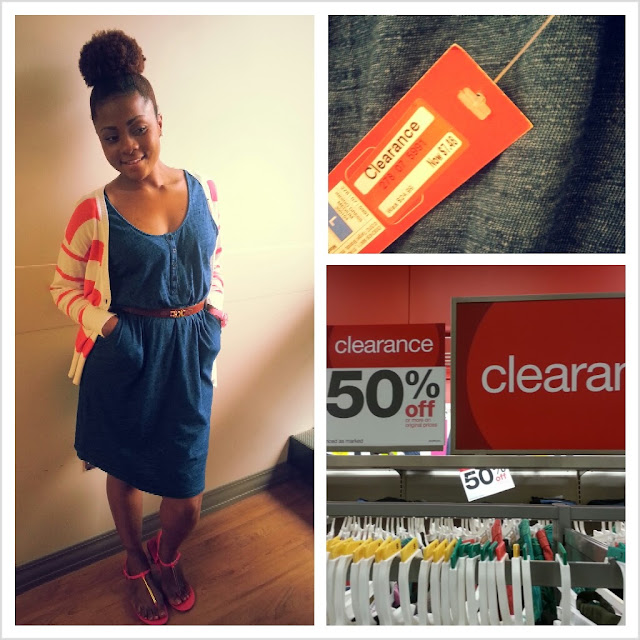
I love that the pattern is cut with an A-line. This type of style always compliments my shape. Most of all, I get to show off some leg. That is always a plus!

Pattern alterations or any design changes you made: 
I extended the pattern by 2 inches to create a dress instead of a shirt and pockets were added. LOVE LOVE LOVE Pockets.

Would you sew it again? I am already working on another one. Have fun with your style and stay beautiful!!!


Have fun with your style and stay beautiful!!

Monday, December 16, 2013

Simple Sewing | McCall M6842 & New Look 6217


Now that my hiatus (moving) is over, I am back to one of my many hobbies....Yes...you guessed it!! Sewing. I came across a fall fabric sale at #hobbylobby and was inspired to create something. That "something" turned out to be something fabulous!! LOL. I am excited about all three looks because they give me a little flare for every occasion.

McCall M6842 | The only difficult part about this pattern is the zipper and the hemming. If you choose a stretch fabric, you can omit this part with an elastic band for support. I selected style A in a size 14 and I had to alter the waist. I would recommend choosing one size down....especially if your going to use stretch fabric. The fit of the skirt is snug around the hip and then it flare out at the bottom. Sorta similar to a mermaid style skirt.

New Look 6217 | Super Simple! You can finish this project in an hour tops. I selected style B in size 14. The fit of the top is very loose. To add a little flare, I cut a V in the back. Sorry I didn't take a picture. Believe me, it looks nice! LOL.
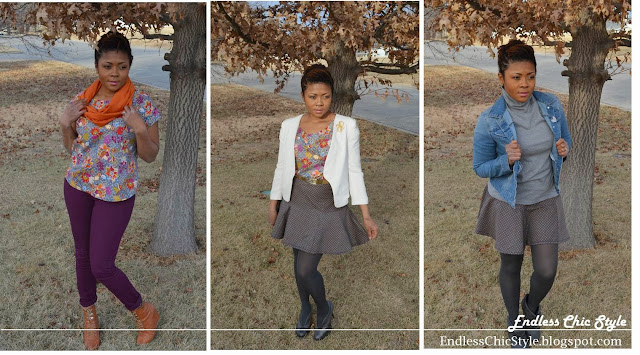
My Mixed Pattern Look.
I toned things down by adding a Cream Blazer (F21), Dark Grey Tights (Wal-Mart), and Dark Grey Booties (Marshall's)

My Casual Corner Look
This look I paired the shirt with an Infinity Scarf (made by yours truly), a pair of Deep Plum Skinny Pant (Wal-Mart), and my Wedge Booties (Justfab).

My Dressed Down Denim Look
In this look I love toning things down with Denim so I paired the skirt with a Denim Jacket (Wal-Mart), a Grey Turtle Neck (Wal-Mart), and a pair of grey booties (Super Old). I'm starting to notice that I shop at Wal-Mart a lot. Oh yeahhhh!! It's the only store in this small, Midwestern town I live in. I guess you gotta work with what you have. Never the less, have fun with your style and stay beautiful!!

Happy Sewing and Happy Holidays!!


Tuesday, September 24, 2013

Fab Find | Classic Handbags


A classic handbag is a staple for any woman's wardrobe because of all the endless options it provide with it's simplistic design. These bags are now on sale on E-bay for a very affordable price. Don't miss out!! Click HERE if you are interested. Remember to have fun with your style and stay beautiful!!

Monday, September 23, 2013

DIY | Jogger Chic

Joggers are a current trend this fall that I have jumped on board with. Outside of going to the gym, I now have an excuse to wear a jogging suit in public....with an updated twist. It allows me to look CHIC, CASUAL, and most of all COMFORTABLE!! The 3 C's I like.


The two patterns I use to create this outfit were Top | New Look Pattern A6217 (similar) and Pants | See & Sew Pattern B5203. After reading the instructions a couple of times, both of them were quite simple to make. The only adjustment I made was adding elastic to the bottom of the pants to create the jogging effect. If this is too much to do, you can find a similar pair here. No matter what, have fun with your style and stay beautiful.


Friday, September 13, 2013

OOTD | Its All About The Accessories

Today was pretty laid back with only a few errands to run and taking care of home......in other words, nothing to get jazzed up about. Shoot! I didn't even put on make up. 

My outfit is pretty plain with a pair of leggings and a stripe shirt I snagged from Old Navy. To Jazz things up, I wore a pair of my favorite shades that complimented the gold tones in my sandals and purse. I am a firm believer that you can upgrade any look with the right accessories. I hope everyone have a great weekend and you will see me in future blogs. Have fun with your style and stay beautiful!


Thursday, September 12, 2013

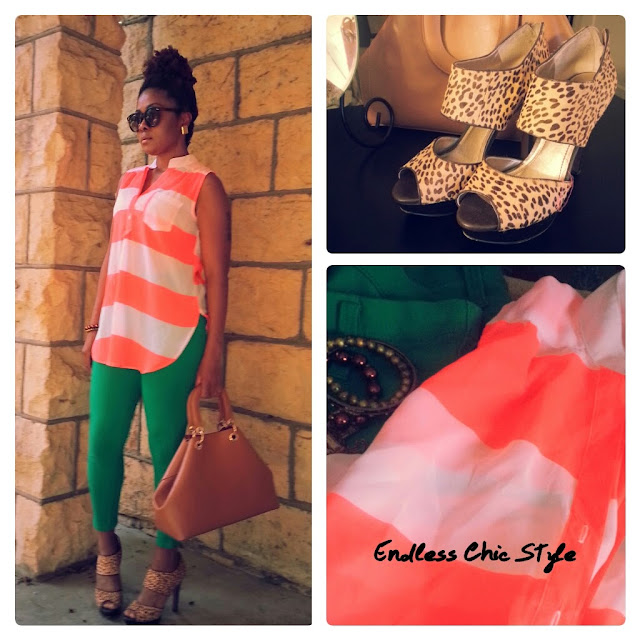
OOTD | Lunch Date

It's not often that I get the opportunity to go on a date with my husband because we are yet to find a sitter to watch our two beautiful kids. Needless to say, I will take what I can get. Lol. Without a doubt, I started my look from the shoes up. These Animal Print BCBGeneration heels were a great find I found on 6pm.com for a steal.......back to the look. Just like my shoes, the rest of my outfit was bold and beautiful. To keep it from looking like a train wreck in heels, I pulled it all together with accessories that complimented each other. I love when I have a reason to dress up. Have fun with your style and stay beautiful!!!!

Monday, August 19, 2013

DIY | How To Sew a Peplum Top Using Two T-Shirts


How many times have you seen a cool T-shirt but the fit was all wrong? Well don't be so quick to pass it by or throw it out the window. In today's DIY, I will show you how I turned two over-sized t-shirts into something fabulous. Most of all, I only had to pay $4 for the entire project....without counting all the other supplies I have on hand..LOL. Nevertheless, Let's get started!!

You will need two oversized T-shirts...The bigger the better. 

 I used a cute tube top I had on hand as a pattern. If you do not have a tube top on hand, simply measure above the breast line and divide the number by two and draw a square out on your fabric.
 Hem the top edge of your tube top.
 It should look like this when your done.
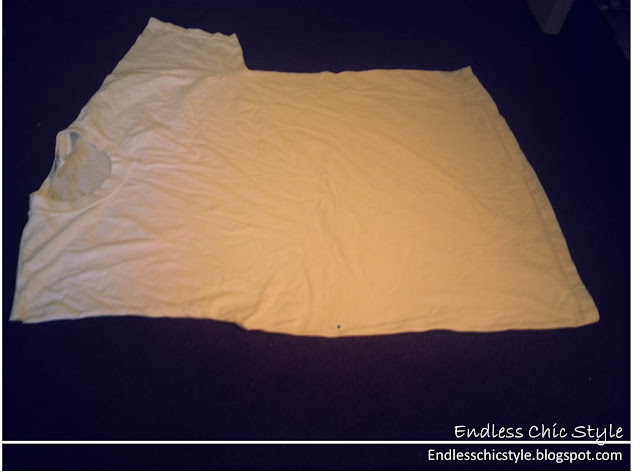
 Next, we will work on the peplum piece of the top. Cut one sleeve off the t-shirt. The goal is to cut it in a straight line. Do not worry about the opening because we will fix it later.
 Your T-shirt should look like this. Place a stick pin right on the center edge of you t-shirt. This will hold the t-shirt in place.
 Next you want to start folding you t-shirt in a triangle fashion until you completely fold the entire shirt. It should look like the picture. Measure out 12 inches...or more if you are taller. Remember to leave room for the hem.
Using chalk, draw a semicircle to guide you with the scissors. 
 Cut the fabric and your peplum should resemble a carrot.
 Open it up and it should look like this. Remember the sleeve I cut off?...well this is where you will sew the the two sides together and leave the opening...open. LOL! Once that is complete you will make sure the opening to your peplum is wide enough. If not, fold the fabric back the way it was and remove a little more. Its better to do a little because you can always take off more later. Once it's cut....It is cut!
 Now that you have cut enough off, your peplum should line up with your tube top. Next you want to him the bottom piece of your peplum and it should look something like the picture on the left.
 Now you want to attach your peplum to your tube top and you are done.Make sure you line the peplum's hemline down the center of the back to give a more professional appearance.

Have fun with your style and stay beautiful!!

Thursday, August 8, 2013

Fab Find Look Book

Stores are currently preparing for the fall season and things are on sale EVERYWHERE!! The three main stores I have showcased in this week's blog are from Tar-jay, Wally's World, and Sears. When I shop out os season, I try to stay away from items that are too trendy. Simple last a lifetime. Have fun with your style and stay beautiful. 
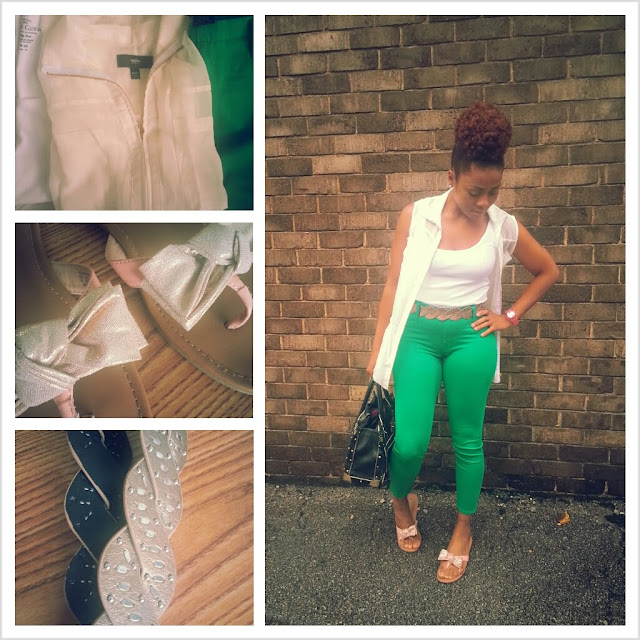
Wednesday, July 31, 2013

DIY | How To Sew a Bandage Bodycon Skirt


DIY projects have become a little hobby of mine. Today I completed the following project in about an hour and I was quite proud of the way it came out. As you scroll down, you will see the steps I took to make it all happen. I hope you enjoy!


For this project, you will need an over sized t-shirt, a ruler, chalk, measuring tape, thread, scissors, and a sewing machine.

Step 1. Start with folding the t-shirt in half. Smooth all the wrinkles out on a flat surface.

Step 2. Measure your waist and hips. Use the formula to determine the measurements necessary to complete the pattern. Using a ruler, mark the measurements on the shirt in a few spots and connect the dots.

Step 3. Cut out pattern.


Step 4. Draw a straight line across the cut out skirt pattern. The distance between each line is approximately 3 inches. Number each line to avoid confusion.


Step 5. Begin sewing pieces together.


 Step 6. Sew the front and back part of the skirt together.
(Note: Make sure all the bandage flaps are sewn down in the same direction)


Step 7. Use scissors to clean up any uneven edges and WHALAH! You're done.

I love this skirt. It hugs the body well and I can't wait to make other colors. I think the next one will be a color blocked bodycon.....We'll see!

Have fun with your style and stay beautiful!


Sunday, July 28, 2013

My Weekend | Golfing and Thrifting


In a still photo, you may think I was the next Stacy Lewis or Inbee Park. Okay....maybe not. This weekend I was able to complete my first golf lesson and it went well. So well, I can't wait to get back over to the driving range and practice my swing. I guess you could say I am channeling my Dad's love for the sport. My husband and I are always saying he should have his own little business coaching people on the sport. He could name it "Pops". Now who wouldn't sign up for that? Lol


Since this is a blog page about style, I can't go without writing about my simple ensemble. Instead of racing out the door to purchase a new outfit to wear to my first golf lesson, I took a look in my closet to decide on something appropriate to wear.


The focus of my entire look was wrapped around the shoes I have on my feet. Yes! I love them. They were a great find at Wal-Mart and I couldn't leave the store without buying them. The rest of my outfit was pretty simple. The skirt and belt was purchased at the thrift store and the sheer blouse was purchased at F21.


The great part about the entire lesson is learning a sport that my husband and I can enjoy together.  


On my way home, I pass right by the Goodwill and I needed some Thrift Store Therapy. Twenty dollars later, I came out with these lovely items. I have great DIY projects in mind and I can't wait to get started. I will definitely share them in future blogs. What DIY projects do you have brewing? Regardless of what they are, have fun with your style and stay beautiful!